Why Focus on Reusability with Types?
In HMI development, as with all development, efficiency and maintainability are key. One of the most powerful ways to achieve both is by building modular, reusable GUI elements. In FactoryTalk Optix, the concept of Types unlocks a tremendous level of flexibility.
Types in FTOptix allow you to create both UI and logic "blueprints"—defining not just how something looks, but how it behaves and communicates. This approach enables:
- Encapsulation: Each element contains its own logic, variables, and interface.
- Reusability: Instantly create multiple, independently-configurable instances.
- Maintainability: Update the Type definition once; all instances benefit.
- Consistency: Standardize appearance and behavior across your HMI.
How-To: Building a Reusable Ping Monitor
Let’s see this in action with a simple network Ping Monitor widget. This widget will simply ping a specified IP address at a programmable interval, and turn a rectangle a color based on its results. Simple, right? Let's go through the steps:
Create a Project
Create a new project in Optix, for whichever platform you'll be developing for.
Create a Home for Your Types
To keep your Types organized, I recommend creating a folder for UI Types (user elements) and one for Model Types (variables).
I have called both folders “Types” here for simplicity.

"Types" folders created to hold the new types we will create.
Create your Data Object
Data Objects in FactoryTalk Optix are like digital containers that hold information your HMI project needs, such as numbers, text, or status values. They organize, store, and share data between logic (scripts), UI screens, and devices.
Think of them as folders of variables you can read from or write to.
To create a Data Object, right-click your Model → Types folder and select "Object."
Rename your new Type appropriately; I named mine PingMonitorLogicType.

Creating a new Data Object.
Create your Variables

Adding Variables Under Data Object.
Add variables within the new Data Object, by right clicking on it, and adding a new variable.
You will need the following:
- IPAddress(string): holds the destination IP
- RoundTripTime(int64): holds the ping RTT in ms
- OnlineColor(color): hex code for success
- OfflineColor(color): hex code for failure
- IsEnabled(bool): allows disabling elements if needed
- PollingIntervalMs(int32): time between pings in ms
- CurrentDisplayColor(color): the color currently displayed
These are your newly created Data Object type variables.

Our Newly Created Data Object Type Variables.
Convert Instance to Type
Right now, you have an instance of an object. To make it reusable and templateable, refactor it into a Type by right clicking, and Refactor->Transform instance into type
Transforming the Data Object instance to a Type makes the object reusable.

Transforming Data Object Instance to a Type.
Set Modelling Rules for Variables
When you create a variable inside a Data Object or Type in FactoryTalk Optix, you can set its Modeling Rule. This determines how that variable behaves when you instantiate the object or Type.
Setting a variable as “Mandatory” guarantees it always exists in every use of your Data Object or Type, making your project more robust and consistent.
Right-click each of the input variables you created (outputs like RoundTripTime can be excluded) and select Change Modeling Rule → Mandatory.
Set each variable’s Modeling Rule to “Mandatory.”

Set each
Create Your UI
Next, create the UI elements users will see and link them to the Data Object you just created.
In this example, start with a panel. Add UI elements like labels to show the IP address and ping time, and a rectangle to visually indicate status.
What you add here depends on your application, but the next steps apply universally.
In this case, I've just created a rectangle with two lables for IP and RTT, and I've linked the fill color of the rectangle to the current color of the data object.
Create an Alias to your Data Object
After building your panel, link it to the Data Object so the UI displays the correct data (IP, ping times, etc.).
Do this by creating an Alias, which exposes those variables to the program:
- Click the UI Type you created.
- In the Properties pane, click the "+" and add an Alias.
- Name it DataSource, and set the Kind attribute to the Data Object you created earlier.
This step adds and links the Alias “DataSource” to your Data Object.

Adding an Alias in our UI Type.

Linking Alias 'Datasource' to our Data Object
Now it's time to...
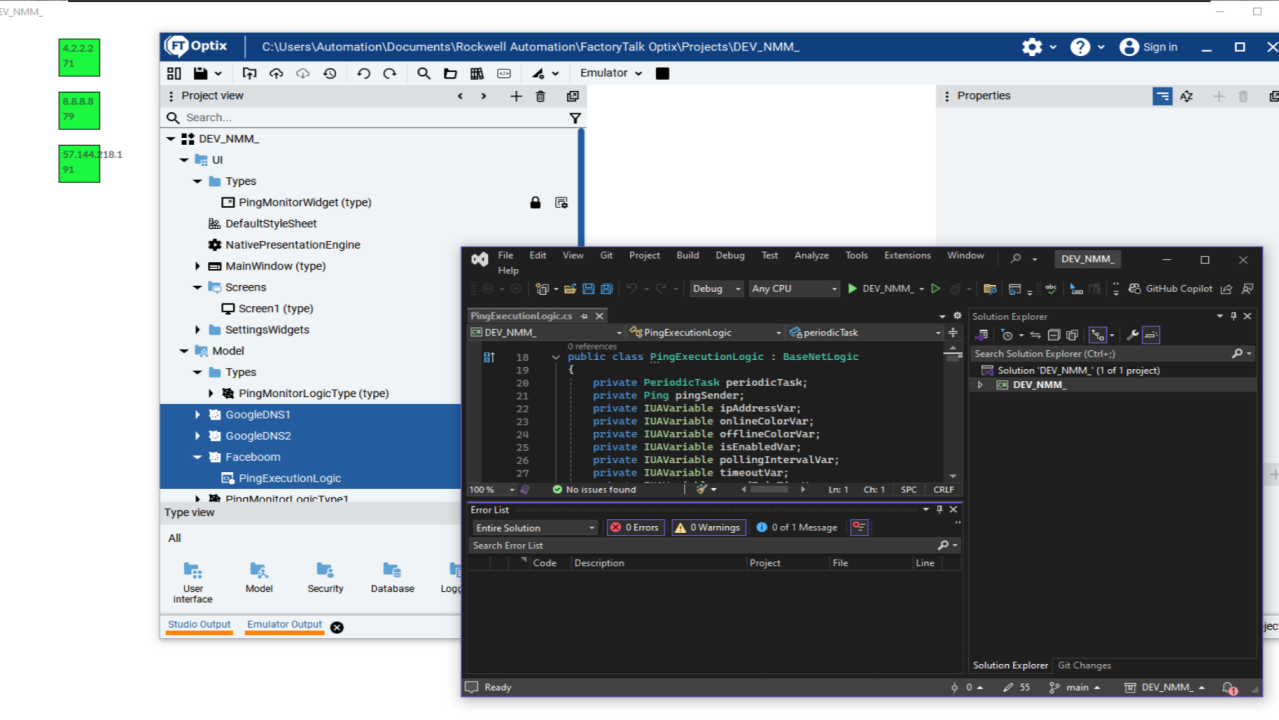
Add your Netlogic
(LinkedIn does not handle code well. Message me if you want the script.)
The Netlogic simply creates a new ping task, reading and writing the input and output variables from the Owner.
Link UI to Variables
Link your UI elements to their associated variables using the Alias you just created. This is the key to passing data back and forth. You will find these under Widget → DataSource.
This is how you link DataSource to UI elements.

DataSource Link to UI Elements
Add an Instance
Now, to use your new Types:
- Create a new UI element by right-clicking your MainWindow, selecting New → Types, and finding the widget you created. This creates an instance in the folder you select.
- Likewise, create a Data Object instance under Model by selecting the Data Object Type.

Adding your new Type as an Instance.

Creating a new Data Object from Type.
This is how you add your new Type as an instance.
Fill in the info for this instance (for example, monitoring 8.8.8.8).

Creating a Ping Monitor for 8.8.8.8
Now, link your UI instance to your Data instance. This will fill the UI with data from your variables and run the Netlogic at startup.

You can create as many of these as you need and rearrange them on the screen. (Feel free to make them look better than my quick example.)
This is your application in action.

Application in Action.
That’s it! You now have a reusable, scalable Ping Monitor widget built using FactoryTalk Optix Types.